Tag Archives: new build

Follow the Build – Mudgee Part 16

IMG_1765

Every bush house needs water tanks for all your water for the house but you now also need 25,000 litres purely designated for fire fighting. The two tanks at the house are for the house. The 40,000 litre tank at the shed is our designated fire fighter.

IMG_3055


Related: Follow the Mudgee build

Follow the build – Mudgee part 17

The last job to do is the landscaping. We marked out the roads with metal edge stripping and then laid all the irrigation for the lawn and trees. The gravel for the roads was next, laid it, levelled and compacted it. Then my son Charlie and I, wi ... [read more]

Follow the Build – Mudgee Part 15

This outdoor BBQ means a lot to the family. So that’s why we kept it and the deck and built the new house around it. All of our family memories have been around that fire. I laid 600 bricks to build it and the hot plate is a 8mm plate weighin ... [read more]

Follow the build – Mudgee Part 13

IMG_1598

I did want a polished concrete floor throughout the house but had some hesitation about slab on ground in the bush. I know it’s done everywhere but I do like the under house ventilation a frame gives you. So I went with steel screw piers as we know, timber frame, and hebel flooring and tiled the entire house with Travertine tiles from Beaumont’s. We finished up with a great look, nice and warm due to the hebel and underfloor heating and a terrific feel under bare foot.

IMG_1600

IMG_1601

IMG_1613

IMG_1753


Related: Follow the Mudgee build

Follow The Build – Mudgee Part 14

It’s always good to start fitting the house out – bathrooms and the like but it’s the kitchen that’s always fun. I love wood stoves and Rayburn still make the same wood stove they’ve been making for years. So I ordered one with a smalle ... [read more]

Follow the build – Mudgee Part 12

TILING THE BATHROOMS It’s always hard to choose tiles for the wet areas, so many choices at Beaumont’s but with the help of the girls there, I came up with some great ideas. I just hope Shayna, Neil and Darren don’t come over for a barbie. ... [read more]

Follow the build – Mudgee Part 12

TILING THE BATHROOMS

IMG_1641It’s always hard to choose tiles for the wet areas, so many choices at Beaumont’s but with the help of the girls there, I came up with some great ideas. I just hope Shayna, Neil and Darren don’t come over for a barbie. In the ensuite though, I did copy Brad and Dale’s winning bathroom from Fans v Favourites.

IMG_1648 IMG_1629 IMG_1643 IMG_1649


Related: Follow the Mudgee build

Follow the build – Mudgee Part 13

I did want a polished concrete floor throughout the house but had some hesitation about slab on ground in the bush. I know it’s done everywhere but I do like the under house ventilation a frame gives you. So I went with steel screw piers as we ... [read more]

Mudgee – Follow the Build Part 11

INTERNAL WALLS At long last, The Block has wrapped up for another year. The auction was outstanding, and I couldn't be happier with all the hard work our Blockheads put in. But now that’s done and dusted, it’s time for me to get back to work ... [read more]

Mudgee – Follow The Build Part 10

EXTERNAL WINDOWS AND DOORS

IMG_1413

It’s been a busy few weeks for me as The Block has gotten down to the business end of the competition. But my projects are coming along nicely.

Here’s the latest update on my project Follow the Build – Part 10.

IMG_1522

It’s always good to get the joint to lock up. I used Airlite’s Platinum range of aluminium window and door frames. Considering the external cladding of corrugated iron is maintenance-free, I wanted the joinery to be the same.

IMG_8366

Of course, it’s not very traditional but it’s that contemporary twist I was previously talking about. The windows and doors are double-glazed to keep the winter warmth in and the cold out, and in summer it will keep the house cooler. The most important point about this gear though is it is maintenance free…

IMG_1524

That’s it for now, but keep a look out for the next blog post coming soon. Let me know your thoughts on the build over on my Facebook page.


Related: Follow the Mudgee build

Mudgee – Follow the Build Part 11

INTERNAL WALLS At long last, The Block has wrapped up for another year. The auction was outstanding, and I couldn't be happier with all the hard work our Blockheads put in. But now that’s done and dusted, it’s time for me to get back to work ... [read more]

Mudgee – Follow the Build Part 9

EXTERNAL WALLS Well, as you know, it's been really busy over the last weeks with The Block and other engagements but I always find time to squeeze in where I can to continue my projects. So here is another update on my project Follow the ... [read more]

Mudgee – Follow the Build Part 9

EXTERNAL WALLS

IMG_1763


Well, as you know, it’s been really busy over the last weeks with The Block and other engagements but I always find time to squeeze in where I can to continue my projects.

So here is another update on my project Follow the Build Part 9.

You would have read in Follow the Build Part 8 - all about recycled oregan pitched roof for my lounge and dining.

IMG_1477

Now if you’re like me, nothing says the Australian bush than corrugated iron. When you combine that with a bit of good old aussie hardwood, you come up with the classic bush house.

IMG_1759

If you combine it with a contemporary twist, you will get a modern feel with a traditional look. I also wanted the house to have a shearing shed look and I think we’re on the way to achieving that. I’m really happy with the progress so far and look forward to doing more…

Well that’s it, for the moment folks. Keep following the build and let me know your thoughts via my Scotty Cam Facebook Page. 

Won’t be long till the next update so stay tuned for part 10 coming very soon…


Related: Follow the Mudgee build

Mudgee – Follow The Build Part 10

EXTERNAL WINDOWS AND DOORS It’s been a busy few weeks for me as The Block has gotten down to the business end of the competition. But my projects are coming along nicely. Here’s the latest update on my project Follow the Build – Part ... [read more]

Mudgee – Follow the Build Part 8

RECYCLED OREGAN PITCHED ROOF FOR LOUNGE/DINING   Here is another update on my project – Follow the Build Part 8.   You would have read in my last post Follow the Build Part 7 where I was working on the kitchen and laundry frame. I’ve a ... [read more]

Mudgee – Follow the Build Part 3

PIERS SETOUT

Mudgee Build Part 3

Here is another update on my project – Follow the Build Part 3.

You would have read in Follow the Build Part 2 which is all about excavation.

Now that we have a good level site I’m getting into the set. It’s so important to come up out of the ground correctly. The rest of the house obviously depends on a correct set-out. String lines, timber pegs, lump hammer, tape measure and of course the plans.

Mudgee Part 3

To get the site level we used a couple of machines (Bobcat, Tractor) and recycled concrete blocks. These blocks are fantastic. Any concrete left in the trucks coming back to the yards has to be disposed of, so they build formwork for these blocks, pour the excess in and sell them for about $40. They weigh a bit over a tonne and make great retaining walls as you can see.

IMG_0818 (1)

As the site is all reactive material, as in clay, there is a lot of movement in the ground due to moisture. Lots of rain the clay swells and drought conditions means it shrinks. This will give your house movement and in turn cracks in your plaster, cornice, even brick work but mostly in the joints.

Screw Piers

So I’m use to a terrific system called screw piers. Basically they’re a steel shaft with a drill bit attached to the end and they are screwed in until they hit stable ground. They are then cut to the right height using a laser level, then bolt on an ant cap and you’re ready for your bearer.

A test drill is done to find stable ground so the excavator knows how deep to go. In my case about 2 ½ mtrs – 3 mtrs. So really my house is actually resting 3 mtrs below ground and when she’s finished I’ll have no movement no matter what the conditions.

Keep following the build and let me know your thoughts via my Scotty Cam Facebook Page.

Won’t be long till the next update so stay tuned for part 4.


Related: Follow the Mudgee build

Mudgee – Follow the Build Part 4

FLOOR FRAME I'm back with another instalment of Mudgee - Follow the Build Part 4. You would have read in Follow the Build Part 3 piers setout. Whilst we're building the new house here at Mudgee, you would have seen the progress of my new b ... [read more]

Mudgee – Follow the Build Part 2

EXCAVATION Here is another update on my project – Follow the Build Part 2. You would have read in my last post Follow the Build Part 1 where it's all about demolishing my old house.  Now that the demo is complete it’s time for excavat ... [read more]

Mudgee – Follow the Build Part 2

EXCAVATION

IMG_5151-625

Here is another update on my project – Follow the Build Part 2.

You would have read in my last post Follow the Build Part 1 where it’s all about demolishing my old house.  Now that the demo is complete it’s time for excavation. You’ll notice a deck at one end of the site with the world’s biggest open fire barbie. I built the deck and barbie about seven years ago. We have tremendous memories of times around that fire cooking meals with friends and kids, lots of photos and lots of fun.

We’ve watched the kids grow up around that fire and I figured I should keep it and incorporate it into the new build. That way when my kids are 40 odd they’ve at least got something of the house they grew up in and can tell some stories (with photos) to their kids.

The barbie used up 600 bricks and has an 18mm hotplate that’s six feet by four feet – she’ll do about 30 T-bones or 20 pancakes or a dozen bacon and eggs at once. Out of all my barbies this one is my pride and joy. I laid the 600 bricks in a day with a labourer – mind you it was a long day and I was a bit younger, that’s why I had to keep it… sentimental value.

It’s going to be tough building around the deck but I’m changing the roof and handrails but keeping the guts of it and, of course, the fire.

Now it’s time for excavation; we’re going to do a bit of cut and fill and levelling up of the site ready for the set out for the piers.

To retain the higher ground I used the recycled concrete blocks I was previously talking about. I put them in with the Bobcat, laid on some level crusher dust, and the blocks make the perfect retaining wall. Once we’ve got the rest of the blocks in I’ll be ready to set out for the piers. Here’s a few photos and the plans for the job are coming soon.

IMG_5149-625

IMG_5150-625

IMG_5153-625Keep following the build and let me know your thoughts via my Scotty Cam Facebook Page. 

Won’t be long till the next update so stay tuned for part 3.


Related: Follow the Mudgee build

Mudgee – Follow the Build Part 3

PIERS SETOUT Here is another update on my project – Follow the Build Part 3. You would have read in Follow the Build Part 2 which is all about excavation. Now that we have a good level site I’m getting into the set. It’s so importa ... [read more]

Mudgee – Follow the Build Part 1

DEMOLISHING MY OLD HOUSE The old house before it was demolished First thing I need to get done is to demolish the old house. There’s a lot of memories for me with the kids and friends in there, so it’s a bit sad. Having said that, the ... [read more]

Mudgee – Follow the Build Part 1

DEMOLISHING MY OLD HOUSE

before

The old house before it was demolished

First thing I need to get done is to demolish the old house. There’s a lot of memories for me with the kids and friends in there, so it’s a bit sad. Having said that, the point is there’s asbestos both inside and on the outside of the old house, and I want my grandkids to enjoy this place in the future, so I have to make the move and get things ready for the next generation. The timber structure of the floor frame, stud walls and roof frame also has some pretty serious termite damage, so it’s time for it all to go.

Now considering we’re dealing with asbestos and a significant amount of it, I always advise other people to bring in the experts, and I’m no different in this case. You’ll end up with a clean, asbestos-free area, a guarantee of a healthy area with certification and, of course, peace of mind for the kids.

I organised a mob from nearby Bathurst to do the asbestos removal, and they did a ripper of a job. Very thorough, professional and good blokes at the same time. They were Phil Hewitt and his team from TPEC Demolition and Asbestos Removal.

The asbestos has to be removed in sheets with as little breakage as possible, so it’s a tough job. The sheets are put into skip bins or trucks lined with plastic and these are tipped at a registered waste station, in this case, at Mudgee Tip. Once all the asbestos is removed and the roof is off, we’re left with a timber frame, and here’s where it gets tricky.

All the timber has to be vacuumed to remove any asbestos residue, then dismantled by hand, stacked and tipped the same way. The site is totally cleaned then an air test is performed over the next week to check for any asbestos particles. When the all-clear is given, a certificate is issued and you’re all good. You can see why it’s the go to get the professionals in.

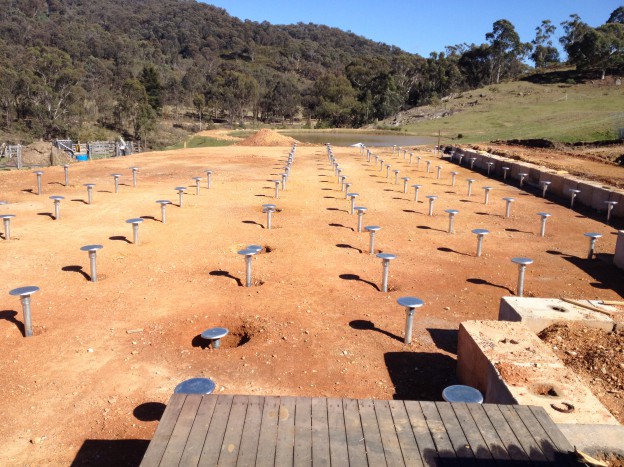
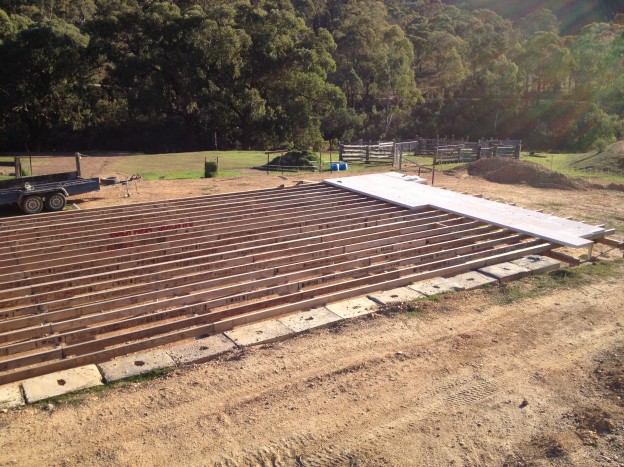
Over the coming weeks I’ll start the excavation. I’ve got an old Bobcat that I’ve had for years and I’ll be bringing a mate in with another to give me a hand. Once the excavation is complete, you’re going to love the new retaining wall. I’m going to build it out of concrete blocks 600mm x 600mm x 1000mm. They weigh about a tonne each and are made from left-over concrete that comes back into the concrete yard. This is poured into formwork to make the blocks and the great thing is that they are about $40 each – nice and cheap.

Stage 1 of the build was the demolition. Here’s a few photos of that – and stay tuned for Stage 2. I’ll put up some photos of the retaining wall once it’s up and I’ll also be popping the plans on the website for you to have a look at and follow.

Keep following the build and let me know your thoughts via my Scotty Cam Facebook Page. 

Won’t be long till the next update so stay tuned for part 2.
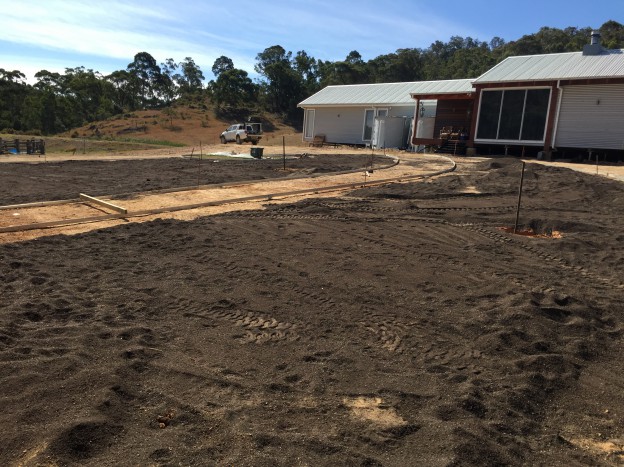
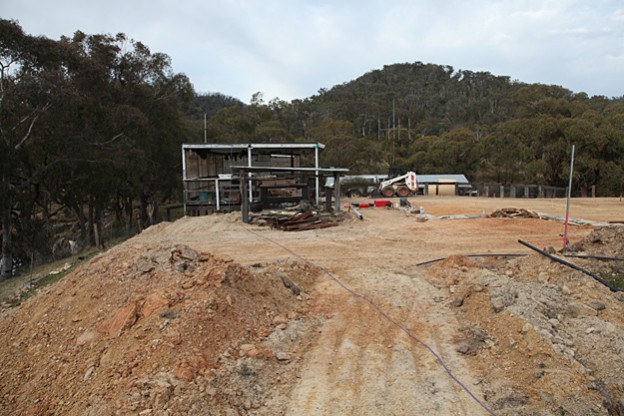
 

after-1

after-2

after-3

after-4

after-5

Related: Follow the Mudgee build

Mudgee – Follow the Build Part 2

EXCAVATION Here is another update on my project – Follow the Build Part 2. You would have read in my last post Follow the Build Part 1 where it's all about demolishing my old house.  Now that the demo is complete it’s time for excavat ... [read more]

Mudgee Build

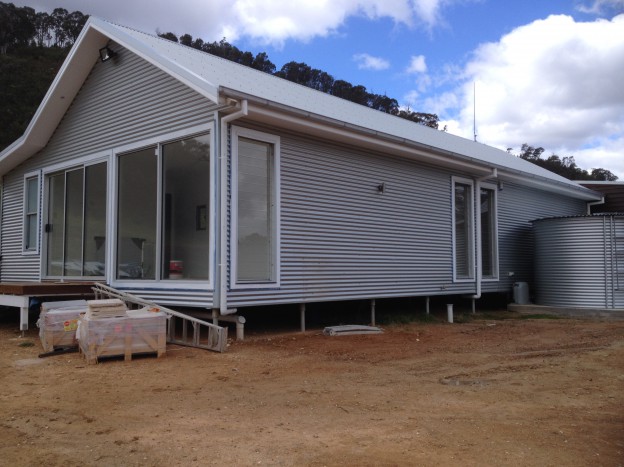
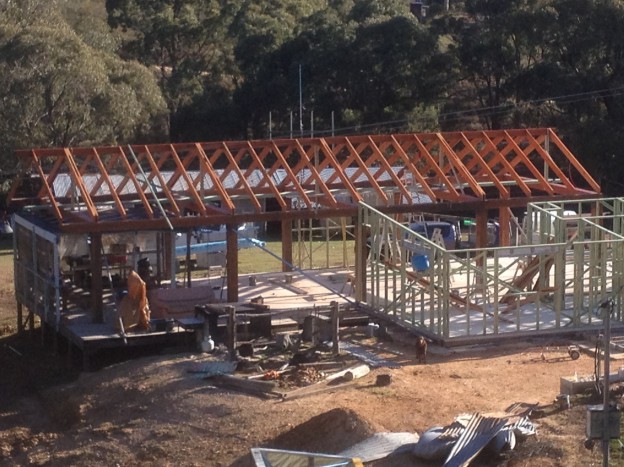
The old shack on my Mudgee bush block has had it, so I’ve knocked it down and built a new place from scratch. It’s a great DIY project, and I’d like you guys to roll out your swags and follow the progress at my ‘Mudgee Build’ blog. I’v ... [read more]

DIY crate – it’s easy mate


There are lots of second-hand crates around that look great and are really handy around the house. They can be expensive though, so check out the how-to video above to learn how you can make your own crate at a fraction of the cost of a shop-bought one. Once you’ve made it you can paint it whatever colour you like, distress and age it by sanding it back or even giving it a couple of good whacks with a chain. In the photos below you can see that we’ve finished ours by doing two different sides. One side is for Rosie, where we have painted her name on then sanded it back, and on the other side we have painted with blackboard paint and use it as a smoko seat – perfect!

mv_sc_crate_materials-7585

mv_sc_cratefinals-7525

mv_sc_cratefinals-7463

mv_sc_cratefinals-7499


Related: Do it Yourself

DIY Peg Hat Rack

https://www.youtube.com/watch?v=MfrrRCl5euQ An interchangeable timber peg board is a way to solve your messy hallway problem. Check out this how-to video to create this cracker of a rack to hang your hats, coats and umbrellas. Just change the p ... [read more]

DIY Real truckies’ knots

If you want to be a complete legend there’s a couple of knots you need to learn! First of all there’s the ‘half hitch’ and then the slightly more complicated ‘truckie’s knot’. Once you get the hang of these beauties you won’t have to ... [read more]