Mudgee is a cold place, so firewood collection is a big job that needs to be done on a regular basis. We’ve got plenty of fallen timber all over the property. So up the mountain we go in a couple of utes and a couple of chain saws and of course the whole family. We load the utes up chocka block and sometimes a trailer as well, then back home for the splitting. I’ve also got a big heavy duty logsplitter. We form a big production line to split all the logs and stack them. I love my fires inside and out, so we go through a fair bit each winter.
It’s no secret that I love dogs. I’ve had a dog since I was born. Barney, Buffy, Clarie, Lizzy and Rosie. Rosie is still going at 12 and Lizzy is stuffed and sitting on the stairs at home. Training a dog to me is very important for t ... [read more]
We would get all kids and neighbours together for rides through the trails on the property. Up the mountain, through the creeks, all over the place, it was a lot of fun. We always took it pretty gentle though, cause it was pretty rough coun ... [read more]
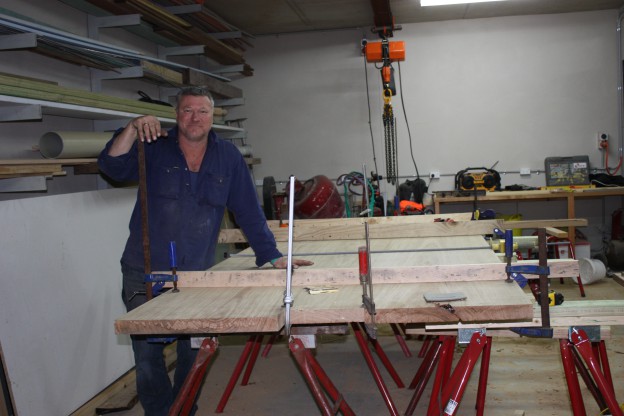
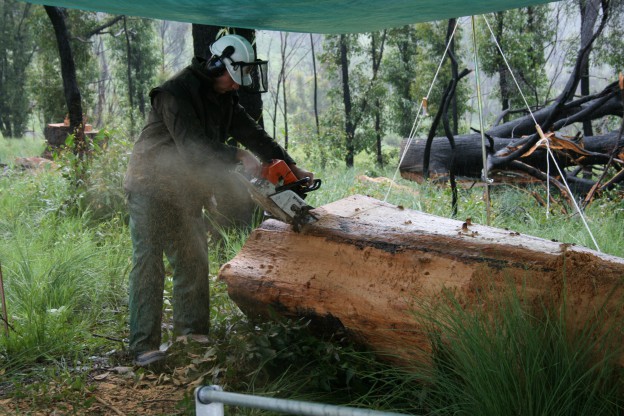
A few years ago I bought a Lucas Mill. It’s a portable saw mill which you build over the log. We head up the top of the mountain where there’s plenty of fallen or dead trees; stringy bark, red box, etc. I drag the barrel of the tree out in the open with the tractor onto level ground, then build the mill over the top. It takes about ½ hour to set up, then you’re away, 4 x 2’s, 6 x 2’s, you can even slab up table tops. It’s been a great purchase. The dining table at home came from the mill. I love it.
Nothing like getting free materials from the bush. The whole family got together. We got about 4 ute loads of reasonably flat river stones and bush rock and together as a team we paved the BBQ area with natural stone. It looks sensational.
... [read more]
One of the greatest tools I have is a Lucas Mill (Google it). It’s a portable mill which you build over the fallen log. We had a nice tree unfortunately come down on the property, a white stringy bark gum. It’s timber is not used that much ... [read more]
One of the greatest tools I have is a Lucas Mill (Google it). It’s a portable mill which you build over the fallen log. We had a nice tree unfortunately come down on the property, a white stringy bark gum. It’s timber is not used that much anymore but in the old days it was used for flooring, furniture and some structural jobs etc. So I threw the Lucas Mill over it, slabbed it up, dried it on the mountain floor for a while, then built our family dinning room table out of it. We’ve had it for about 10 years now and love it. In fact I’m writing this story sitting at it right now.
A few years ago I bought a Lucas Mill. It’s a portable saw mill which you build over the log. We head up the top of the mountain where there’s plenty of fallen or dead trees; stringy bark, red box, etc. I drag the barrel of the tree out in th ... [read more]
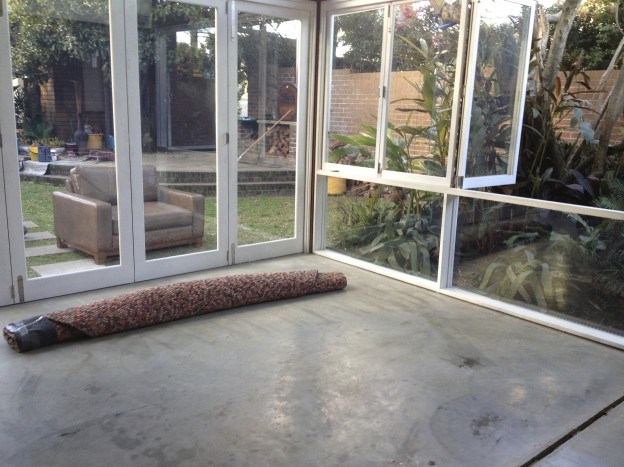
This was an outdoor area at home but it was never used so I decided to put in bifold doors, a side window and fixed glass surrounding this space. We gained an extra room and created a new space away from the existing lounge with great views of ... [read more]
You know when you’ve gotta leave a message for someone at home and you cant find paper or a pen?
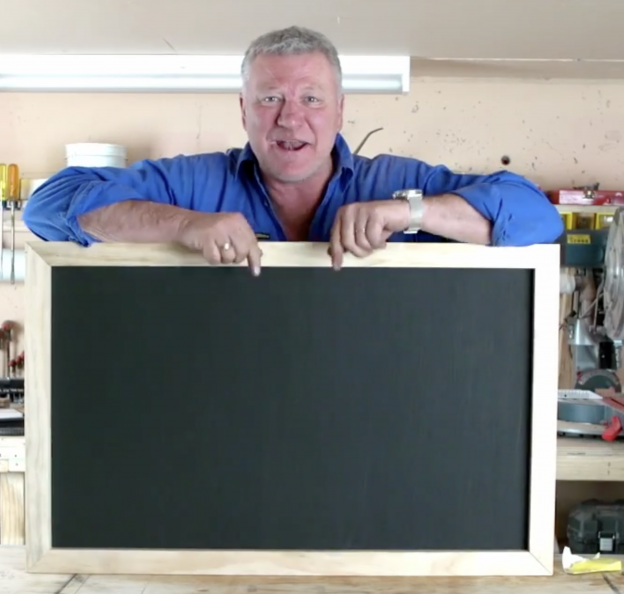
Check out this how-to video to make yourself a little blackboard for all the family to use. It’s perfect for the kitchen where everyone can write their messages and a great idea for your shopping lists too.
Have a look at the photos below how easy it is to create this timber framed message board.
Step 1: Paint
First, you’ll need a 565mm by 900mm MDF board. Then you can paint your MDF board with blackboard paint. You can leave it to dry while you knock up your timber frame.
Step 2: Measure the timber lengths
You can now cut your lengths of timber. I’ve used a drop saw. The timber frame needs to go on the face of the blackboard, so therefore you want your frame to be slightly bigger than your board. So the outside of the frame should measure 575mm by 910mm.
Step 3: Cut the timber
I’m using mitre joints, which are quite difficult if you don’t have a drop saw. You could also use a mitre box or butt joint your joints if you aren’t confident.
Step 4: Line up the lengths of timber
You should have two long bits and two short bits to make up your frame. It’s important that all four pieces are exactly the same in length to the half mill, so you don’t throw your dimensions out.
Step 5: Sit the blackboard in the frame
You can then nail the frame to the bench to hold it in position, then place the blackboard over the top of the frame, about 5mm from each edge. Now you can screw the blackboard to the frame, and you have a blackboard for the kitchen where everyone can leave their messages.
https://www.youtube.com/watch?v=LEnUN-yoj84
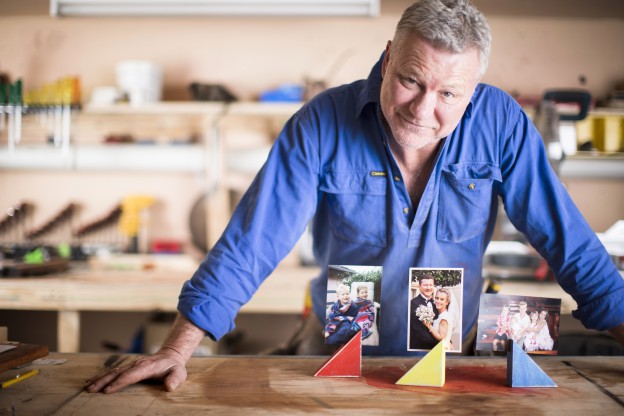
Do you have lots of photos sitting in a draw? Why not let your family and friends enjoy some of these memories?
Watch this how-to video to make some simple and creative photo holders that you can us ... [read more]
https://youtu.be/8iee3OCNHTg
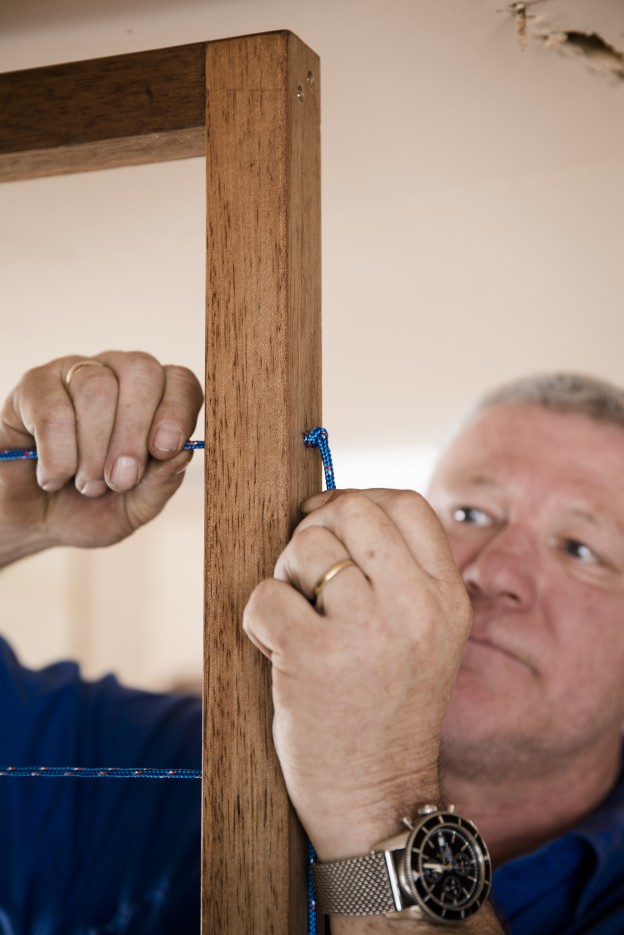
Here is a great idea to keep your magazines tidy and in order. Take a look at this how-to video of creating this easy magazine wall display.
The pictures below also show how simple it is to create this timber fram ... [read more]
Here is a great idea to keep your magazines tidy and in order. Take a look at this how-to video of creating this easy magazine wall display.
The pictures below also show how simple it is to create this timber frame and then to add the rope – drill, thread, knot and its ready to go.
Step 1: Measure and mark
\
Measure and mark 600mm (or find the centre) on one 1.2m timber length.
Step 2: Cut the timber
Cut the timber using a drop saw (a handsaw will also get the job done). This will give you two 600mm lengths – these will be the top and bottom of the frame. Measure and mark the thickness of the timber on both ends of the second 1.2m length. This will make sure you don’t go too close to the edges when drilling. Repeat process on second 1.2m length.
Step 3: Find the centre and drill
Find the centre of the traced-out square on one end of the 1.2m timber and use a drill and drill bit to make two holes on either side of the centre point, about 1cm apart. Repeat on all four ends. Make sure the holes are slightly bigger than the screw, so the screw has room to move.
Step 4: Form the frame
Clamp bottom timber (600mm length) on table. Insert screws into the 1.2m-timber holes and align timber and screws on the side of the 600mm length, creating a corner, and screw in place. Repeat process on all four sides, forming a frame. Sand frame well and give it a stain. Leave to dry.
Step 5: Measure and mark
Measure and mark 150mm in one of the 1.2m sides, starting from the corner. Then from the first 150mm mark, measure and mark another 150mm space this process until you have six marks and a 150mm space between each. Repeat process on the other 1.2m side.
Step 6: Measure and mark
Measure and mark 21mm in at each 150mm point using a combination square. This will give you the exact centre point, so you drill in the centre of the timber.
Step 7: Drill the holes
Using a drill and a drill bit that is slightly bigger than the rope, drill holes going all the way through each mark. You should now have 12 holes, six on either side.
Step 8: Thread the rope
Thread the rope through the holes, cut off excess rope and tie a knot on the ends, making sure the rope is as tight as possible so the string stays in place.
https://www.youtube.com/watch?v=eOE7CAfQ7QU
You know when you’ve gotta leave a message for someone at home and you cant find paper or a pen?
Check out this how-to video to make yourself a little blackboard for all the family to use. It's ... [read more]
https://www.youtube.com/watch?v=Exh6v5Gr5hU
These art boards are a great way to show off your kid’s art work and knowing how many masterpieces come home each week from school, its also an easy way to update the displays.
Have a look at the ... [read more]
These art boards are a great way to show off your kid’s art work and knowing how many masterpieces come home each week from school, its also an easy way to update the displays.
Have a look at the how- to video and the pictures below, to check out the easy instructions, including a safety tip when using power tools.
Step 1: Position A4 paper
Position A4 sheet and bulldog clip on top of the timber.
Step 2: Mark out the border
Use a pencil and ruler to create a border around the sheet. I did 280mm across and 370mm down to create an equal border.
Step 3: Cut the timber
Cut the timber to size using a drop saw or handsaw.
Step 4: Shape the edges
Use a hand planer to shape the edges of the timber. This will create a smoother and cleaner look while also making the sanding process easier. The best way to plane timber is by starting with the side grain (two longer sides), then across the end grain (top and bottom) to ensure the ends don’t split.
Step 5: Sand the timber
Sand the timber well for a much smoother finish.
Step 6: Stain the timber
Use a cloth to stain the timber. Latex gloves are essential to avoid staining your hands. Leave to dry.
Step 7: Mark the drill point for the bulldog clip
Position A4 sheet and clip onto the timber. Measure halfway across the top of the timber and find the centre point. With a 285mm top the middle point sits at 142.5mm. Place bulldog clip on the 142.5mm point, bringing it 1cm down from the top.
Step 8: Screw the bulldog clip
Screw bulldog clip in place using a drill and clip in the artwork.
https://youtu.be/8iee3OCNHTg
Here is a great idea to keep your magazines tidy and in order. Take a look at this how-to video of creating this easy magazine wall display.
The pictures below also show how simple it is to create this timber fram ... [read more]
https://www.youtube.com/watch?v=u8rgQEJNKzw
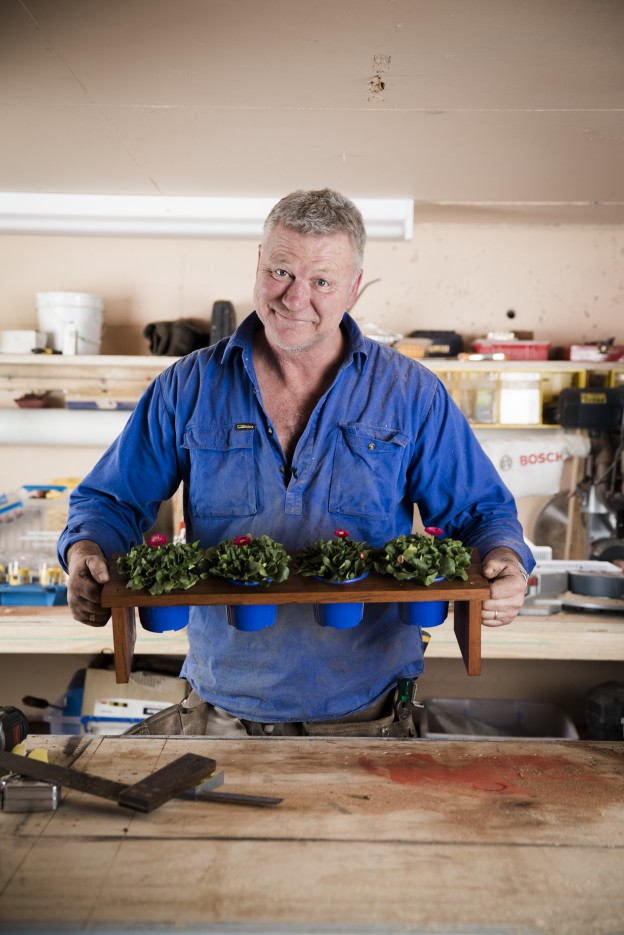
Do you want your kitchen window sill to look greener?
Then watch this how-to video to make the perfect shelf for your pots. This simple timber plant stand, for inside or outside, is just the thing for ... [read more]
I visited Japan a few years ago and dropped into a master carpenter’s workshop. What an incredible experience it was! The timber, the tools, the craftsmanship, it was all amazing.
The handsaw in the photo was used to cut a 60mm slab from a large piece of timber, about 4mtrs long 500 x 500, all cut by hand. A chalk line was flicked on both sides of the timber and my old mate used this saw to hand cut the slab, always keeping to the lines on both sides and square and true. Amazing!
This saw is a pull saw so the cutting is done on the pull stroke not the push. In the third photos you can see some of the many chisels that my Japanese carpentry mate has. Incredibly sharp and beautifully maintained, they treat their tools like gold.
This was an outdoor area at home but it was never used so I decided to put in bifold doors, a side window and fixed glass surrounding this space. We gained an extra room and created a new space away from the existing lounge with great views of ... [read more]
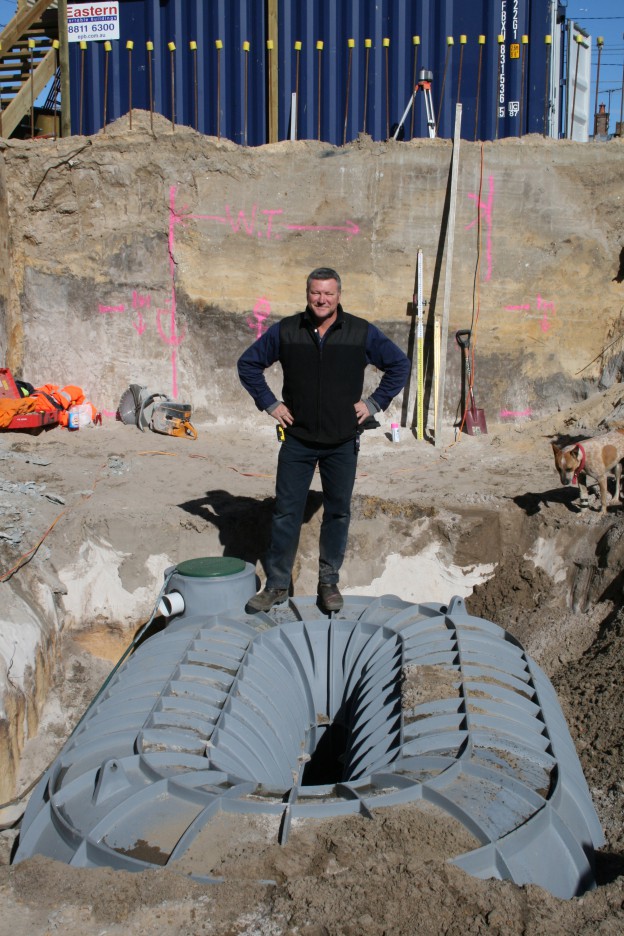
These days recycled water is the way to go. Why we got rid of rainwater tanks years ago is beyond me. I’m glad to see them coming back. We know that rainwater is a valuable source. Using rainwater not only helps to reduce your bills therefore s ... [read more]
For my first interest story I came up with an idea of incorporating my beautiful avocado tree to come out of the deck at my home. My avocado tree created the best natural umbrella for the deck so we decided it was the perfect place for outdoor dining.
With this idea, I started to get to work. Using some recycled oregan for the base and FC sheeting for the top, I made the base down in the workshop and then reassembled it around the tree.
The base was made to suit the FC sheet 2400 x 1200 x 25 thick. It’s a very simple construction of a perimeter beam mitred at the corners and galvanized bolts to the legs.
I painted the base with an intergrain product, Dimensions 4 Primer the DWD top coat. This product is terrific for external timber protection (see Mudgee – Follow The Build Part 8). The FC sheet was cut in half and then the opening for the trunk was cut in because of the weight of the FC sheet. Once done, I sat it on top of the base unfastened.
The end result above. We have had many a great family dinner and lunch under the shade of the old avocado tree.
Well that’s it for the moment folks. Keep following my Interest Stories and let me know your thoughts via my Scotty Cam Facebook Page.
Won’t be long till the next Interest Story where I explore another idea that you can use.
These days recycled water is the way to go. Why we got rid of rainwater tanks years ago is beyond me. I’m glad to see them coming back. We know that rainwater is a valuable source. Using rainwater not only helps to reduce your bills therefore s ... [read more]
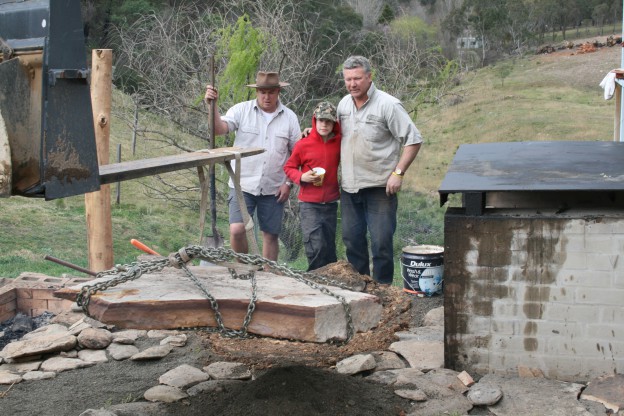
One of my favourite things to do is Boiling the Billy. Boiling the Billy is most often making tea. Waltzing Matilda is best know for it’s first verse and chorus which was changed later by the Billy Tea Company to “And he sang as he watched an ... [read more]
Here is another update on my project – Follow the Build Part 8.
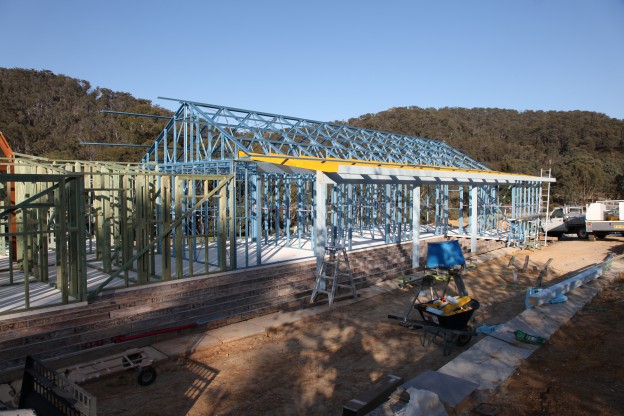
You would have read in my last post Follow the Build Part 7 where I was working on the kitchen and laundry frame. I’ve already got the structural post and beams up with my ironbark and now it’s time to pitch the roof.
I’m using recycled oregan beams. There will be a double rafter over the posts to fill out the look and singles everywhere else.
You will see that I’ve pre-painted the rafters using Intergrain DWD. I love this product! It really brings out the natural look of the timber as you can see in the picture. The sun is just gleaming on those timber posts.
Finally, strutting the ridge beam are ironbark fence posts also painted with DWD. Don’t they look terrific! It was a big job indeed but what a result.
Well that’s it, for the moment folks. Keep following the build and let me know your thoughts via my Scotty Cam Facebook Page.
Won’t be long till the next update so stay tuned for part 9 coming very soon…
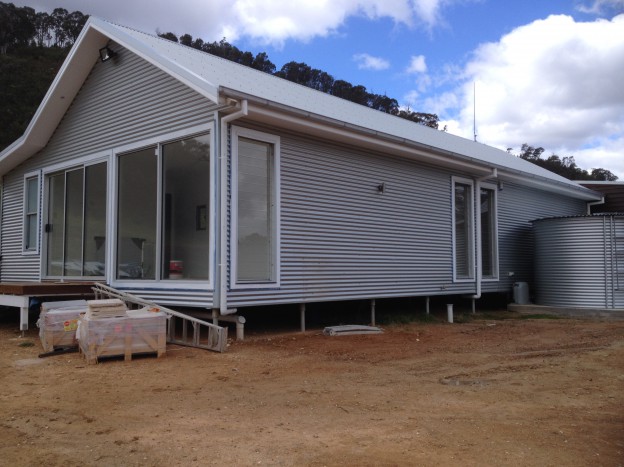
EXTERNAL WALLS
Well, as you know, it's been really busy over the last weeks with The Block and other engagements but I always find time to squeeze in where I can to continue my projects.
So here is another update on my project Follow the ... [read more]
KITCHEN AND LAUNDRY FRAME
Here is another update on my project – Follow the Build Part 7.
You would have read in Follow the Build Part 6 about using Bluescope Steel. Working away on the kitchen and laundry frame, it was a little differen ... [read more]